Views: 0 Author: Site Editor Publish Time: 2026-08-25 Origin: Site

Overheating in a refrigeration system is a massive red flag. It acts as a lagging indicator of deeper mechanical or electrical failures. Poor piping design, restricted airflow, or voltage imbalances rarely fix themselves. Left ignored, high operating temperatures destroy motor windings. They cause mechanical seizures and create severe safety hazards like terminal venting. Catastrophic compressor failure wrecks facility uptime and ruins product inventory. You have to catch thermal escalation early. This guide breaks down a structured diagnostic approach. We will show you how to pinpoint the root cause of high operating temperatures. You will learn how to evaluate internal damage accurately. Finally, we help you decide whether the system needs component repair or a complete compressor replacement.
Suction Gas Dependency: Semi hermetic reciprocating compressors rely heavily on return suction gas for motor cooling; low refrigerant levels or high superheat directly cause thermal escalation.
Electrical vs. Mechanical Faults: Overheating must be isolated into distinct categories—electrical (voltage imbalances, high amp draw) or mechanical (valve failure, physical lockup, lubrication breakdown)—to prevent misdiagnosis.
The Role of Condensing Temperatures: Elevated discharge pressures and high condensing temperatures are the most frequent environmental drivers of thermal overload, particularly in rooftop equipment.
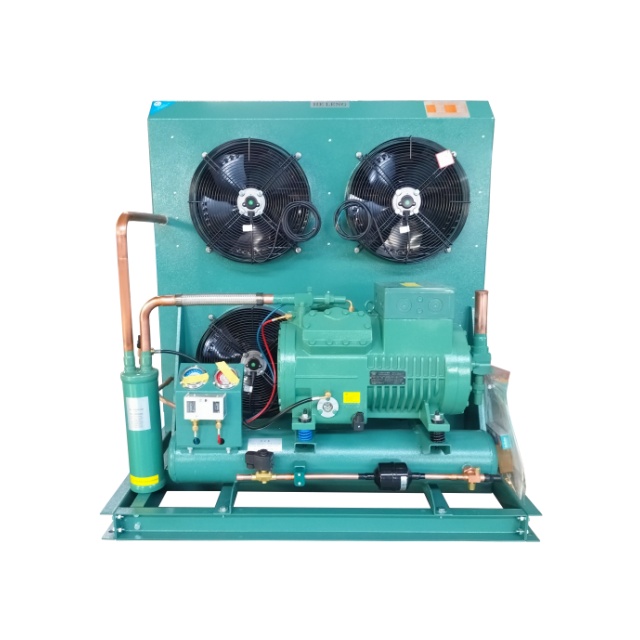
Repair vs. Replace Threshold: Repeated thermal cycling degrades motor winding insulation; evidence of acid formation, severe winding degradation, or age-related mechanical wear usually dictates replacing the Semi Hermetic Compressor Unit rather than attempting a high-risk rebuild.
Refrigeration systems rely on specific internal architectures to manage heat. Return refrigerant gas enters the compressor and passes directly over the motor stator. This gas absorbs electrical heat before entering the cylinders for compression. The mass flow rate of this suction gas dictates the cooling capacity. If the gas volume drops, the motor loses its primary cooling mechanism. Technicians must maintain manufacturer-specified suction pressure and superheat. Proper superheat ensures the gas is cool enough to absorb heat but warm enough to prevent liquid slugging. When systems operate outside these parameters, thermal management fails rapidly. The compressor motor generates immense heat during continuous operation. Without adequate gas flow, this heat remains trapped inside the cast iron shell. Internal temperatures escalate until mechanical or electrical limits are breached.
Cooling failures typically originate from a few common field issues:
Restricted suction filters reducing the total volume of returning gas.
Starved evaporators feeding warm, low-density vapor back to the compressor rack.
Improperly adjusted thermostatic expansion valves hunting and starving the coil.
Uninsulated suction lines absorbing excessive ambient heat before reaching the mechanical room.
Compressor motors utilize specific insulation classes to withstand operational heat. Class F and Class H insulation are standard in heavy-duty commercial refrigeration. However, these materials have strict thermal thresholds. Sustained heat degrades the dielectric strength of the winding insulation. Every time the motor overheats, the insulation becomes more brittle. Thermal cycling accelerates this cumulative damage. The expansion and contraction of the copper windings create microscopic cracks in the varnish. Eventually, these cracks expose bare copper wire. This exposure leads to short circuits between windings or direct shorts to ground. Once the insulation fails, the motor burns out completely. You cannot reverse this damage. Preventing the initial thermal overload is the only way to protect the stator assembly.
Signs of severe thermal degradation include:
Discolored or blackened copper windings visible during a teardown.
Brittle lacing cord snapping off around the stator heads.
A strong, burnt oil smell lingering inside the compressor body.
Carbon deposits coating the internal crankcase walls.
Elevated discharge pressure forces the compressor to perform excess work. This condition generates heat that easily exceeds the cooling capacity of the return gas. High condensing temperatures are the most frequent environmental drivers of thermal overload. Dirty condenser coils restrict airflow and trap heat. Failed condenser fans completely halt the heat rejection process. Extreme ambient sun loads severely impact rooftop equipment. As the condensing temperature rises, the compression ratio spikes. The compressor must push gas against a much higher head pressure. This mechanical strain draws higher amperage, generating additional electrical heat. The discharge gas temperature climbs exponentially. If the discharge line exceeds safe limits, the internal oil begins to vaporize. You must keep condenser coils clean and ensure all fans operate at full capacity.
Low refrigerant levels drastically reduce the mass flow rate of the suction gas. System leaks are the primary cause of this condition. A starved evaporator produces high superheat. The return gas arrives at the compressor far too warm to provide adequate cooling. The outcome is highly destructive. The compressor works harder and runs longer cycles to reach thermostat setpoints. It receives inadequate cooling during these extended run times. Internal temperatures spike rapidly. The motor windings bake in the thin, hot gas. The lack of dense refrigerant vapor means heat cannot transfer away from the stator. Technicians often find overheated compressors running continuously on low-charge systems. Fixing the leak and restoring the correct charge is mandatory to restore thermal balance.
Compressors radiate significant heat through their cast iron shells. Ambient airflow around the compressor body is necessary to dissipate this radiated heat. Installing units in confined, poorly ventilated indoor mechanical rooms creates severe risks. Without proper exhaust or makeup air systems, the room temperature climbs steadily. The compressor essentially re-breathes its own rejected heat. Outdoor units face different ambient challenges, such as direct sunlight and debris. Indoor units require calculated CFM airflow to maintain a stable ambient environment. Louvers and exhaust fans must match the total heat rejection of all equipment in the room. If the ambient air exceeds 100°F, the compressor loses its ability to shed shell heat. This environmental factor directly contributes to internal thermal overload.
The crankcase heater prevents liquid refrigerant from migrating to the oil during off-cycles. Refrigerant naturally migrates to the coldest part of the system. In an idle compressor, the oil absorbs this liquid refrigerant. A failed heater allows this dangerous mixture to form. Upon startup, the sudden pressure drop causes the liquid refrigerant to boil violently. The oil foams and washes out of the bearings. This leaves the crankshaft and connecting rods without proper lubrication. Severe friction-induced heat develops immediately. The bearings score, and the internal temperature skyrockets. Crankcase heaters are inexpensive components, yet their failure destroys entire compressors. You must verify heater operation during every routine maintenance visit. Measure the amp draw of the heater to confirm it is actively warming the oil sump.
Broken or worn suction and discharge valves disrupt the compression cycle. These reed valves control the directional flow of refrigerant. When they fail, hot, high-pressure discharge gas leaks back into the suction side. This phenomenon is known as internal blow-by. The compressor re-compresses this already-heated gas. Recompressing hot gas exponentially increases the discharge temperature. The overall unit heat rises dramatically. Valve plate damage often results from liquid slugging or normal metal fatigue. You can identify this issue by observing abnormal pressure readings. The suction pressure will run higher than normal, and the discharge pressure will run lower. The compressor will run continuously but fail to cool the refrigerated space. Replacing the valve plate early prevents catastrophic motor burnout.
Prolonged operational wear degrades internal mechanical components. General old age increases bearing clearances and wears down piston rings. These widened clearances lead to significant internal friction. The compressor loses its volumetric efficiency. Secondary blow-by occurs past the worn piston rings. All these factors contribute to a rising baseline operating temperature. The motor must run longer to achieve the same cooling effect. The increased friction generates localized heat spots on the crankshaft and wrist pins. Eventually, the mechanical drag becomes too great. The motor pulls excessive amperage to overcome the friction, generating even more heat. Age-related wear is unavoidable. Monitoring amp draws and discharge temperatures helps predict when a compressor is nearing the end of its mechanical lifespan.
Extreme heat breaks down polyolester and mineral oils. High temperatures reduce oil viscosity and destroy its lubricity. The oil begins to polymerize, forming sludge and solid deposits. This creates a vicious cycle of destruction. Poor lubrication leads to increased mechanical friction. This friction generates more heat, which further degrades the remaining oil. The oil turns dark and emits a foul, acrid odor. Acid forms within the system, attacking the motor winding insulation. Ultimately, the lack of lubrication leads to physical mechanical seizure. The pistons lock inside the cylinders, or the bearings weld to the crankshaft. Regular oil sampling is critical. If the oil shows signs of thermal breakdown, you must change it immediately to save the compressor.
Three-phase power supplies must deliver balanced voltage across all legs. A voltage imbalance of even 2-3% causes a disproportionate temperature rise in the motor windings. The NEMA formula dictates that the percentage of temperature rise equals twice the square of the voltage unbalance. Therefore, a small voltage issue creates massive thermal stress. Single-phasing is even more destructive. The loss of one power leg forces the remaining two legs to carry the entire load. The motor pulls locked rotor amperage and overheats in seconds. Phase monitors are essential protective devices. They shut down the control circuit if voltage drops or a phase is lost. Operating without phase protection guarantees eventual motor failure due to electrical overheating.
Electrical contactors degrade over time due to constant cycling. The copper contacts become pitted and covered in carbon deposits. This pitting creates electrical resistance. Resistance across the contactor causes a voltage drop before the power even reaches the compressor. The motor responds by pulling higher amperage to maintain the required torque. This high amp draw generates excessive heat within the stator windings. You must inspect electrical panels and motor terminals regularly. Look for discolored wires, melted insulation, or signs of arcing. Measure the voltage drop across the contactor while the compressor is running. If the drop exceeds acceptable limits, replace the contactor immediately. Ignoring degraded electrical components directly causes compressor motor burnout.
Extreme internal heat and electrical shorting create severe safety risks. The compressor terminals pass through the cast iron shell using glass insulators. When a motor burns out, the internal arcing can melt this glass. This failure mode is known as terminal venting or a terminal blowout. The compressor expels pressurized, vaporized oil and refrigerant through the blown terminal hole. This highly flammable mixture poses a significant fire hazard. It can cause severe injury to anyone standing nearby. Proactive overheating diagnostics prevent this dangerous scenario. If a compressor repeatedly trips its internal overload protector, do not force it to run. Investigate the root cause immediately to prevent a catastrophic terminal failure.
Diagnostic Troubleshooting Matrix
Symptom | Potential Root Cause | Diagnostic Action |
|---|---|---|
High Suction Superheat | Low refrigerant charge or restricted TXV | Leak check system; verify subcooling and TXV bulb placement. |
High Discharge Temperature | Dirty condenser or broken condenser fan | Clean coils; measure fan amp draw; check ambient airflow. |
Compressor Short Cycling | Low pressure switch tripping due to low charge | Attach gauges; monitor suction pressure during run cycle. |
Oil Foaming on Startup | Failed crankcase heater | Measure heater resistance and verify voltage during off-cycle. |
Abnormal Amp Draw (High) | Voltage imbalance or mechanical friction | Measure line voltage across all phases; check for pitted contactors. |
Technicians require a standard operating procedure for temperature diagnostics. First, measure the suction line pressure at the compressor service valve. Convert this pressure to saturation temperature using a PT chart. Next, place a calibrated temperature probe on the suction line, roughly 6 inches from the valve. Subtract the saturation temperature from the measured line temperature to find your actual superheat. Compare this against manufacturer targets. For discharge temperatures, place a probe 6 inches from the discharge service valve. Baseline acceptable discharge line temperatures usually max out at 225°F. If the discharge temperature approaches 250°F, internal oil breakdown is actively occurring. You must shut the system down and correct the airflow or charge issues.
Use a Megohmmeter to test the integrity of motor winding insulation. A Megger applies high voltage to measure resistance in megohms. This test identifies insulation breakdown without causing further damage. Readings below 20 megohms indicate severe winding degradation. Next, conduct running amp draw analyses across all phases. Imbalanced amps point to electrical supply issues or internal stator shorts. If the compressor hums but fails to start, measure the inrush current. If the meter reads Locked Rotor Amps continuously, you have a physical lockup. Mechanical seizure requires immediate replacement. Never bypass safety overloads to force a locked compressor to start.
Pulling an oil sample is mandatory after any overheating event. You must evaluate the physical condition of the lubricant. Use an acid test kit designed for the specific oil type. The test involves mixing the oil sample with a chemical reagent. A color change indicates the presence of acid. Acid formation proves severe oil breakdown and imminent motor burnout. If the oil tests positive for acid, immediate intervention is required. You must perform multiple oil changes and install oversized suction and liquid line filter driers. Run the system and retest the oil until the acid is completely removed. Failing to clean the system guarantees the replacement compressor will suffer the same fate.
Facility managers must compare the reality of internal component replacement versus full unit replacement. Rebuilding involves replacing valve plates, stators, or bearings on-site. This requires significant labor hours and specialized tools. You must factor in the hidden operational impacts of system contamination. If a burnout has occurred, acid cleanup and core filter drier replacements add days to the downtime. Nursing a damaged compressor back to life often results in repeated failures. The mechanical viability of the remaining components is highly questionable after a severe thermal event. Calculate the cost of lost product and facility downtime. In most commercial applications, minimizing downtime makes full replacement the most logical operational choice.
Define strict thresholds for replacement. Severe mechanical scoring on the crankshaft dictates a new unit. Heavy acid contamination or physical lockup makes rebuilding impossible. Repeated thermal lockouts indicate irreversible winding damage. In these scenarios, upgrading to a modern, high-efficiency Semi Hermetic Compressor Unit is the superior choice. New units provide long-term efficiency gains and robust warranty protections. You eliminate the risk of secondary failures associated with nursing a compromised, aging asset. Modern compressors feature improved motor designs and better thermal protection modules. Specifying a new semi hermetic reciprocating compressor restores system reliability and protects your facility from unpredictable refrigeration failures.
Pull an oil sample immediately to test for acid formation and lubricant breakdown.
Measure voltage drop across all contactors and replace any pitted or degraded electrical components.
Verify suction superheat at the compressor inlet matches manufacturer specifications to ensure adequate motor cooling.
Megger the compressor motor to confirm insulation integrity before attempting to restart a tripped unit.
A: The maximum safe discharge line temperature is typically 225°F, measured 6 inches from the discharge valve. Internal temperatures exceeding 300°F at the valve plate cause rapid oil breakdown and mechanical failure.
A: Low refrigerant reduces the mass flow rate of suction gas returning to the compressor. The motor relies entirely on this dense, cool gas to dissipate electrical heat. Without it, the motor runs hot and eventually burns out.
A: Yes. A failed heater allows liquid refrigerant to migrate into the oil during off-cycles. On startup, the oil foams, stripping lubrication from the bearings. This causes severe friction, overheating, and mechanical seizure.
A: Signs include higher-than-normal suction pressure, lower-than-normal discharge pressure, and elevated discharge temperatures. The compressor runs continuously but fails to meet cooling demands due to recompressing hot gas.
A: You fix high superheat by identifying and repairing refrigerant leaks, restoring the factory charge, and verifying the thermostatic expansion valve is operating correctly and not restricted.
A: Use a Megger to test for shorted windings. If insulation tests fine, measure startup amps. If the meter reads Locked Rotor Amps continuously without the compressor turning, it is physically locked up.